


Over the last three weeks Katia Yarns USA has released kits in collaboration with some great designers. This week is my turn! I wanted something quick and easy to complete in an afternoon. I revamped an older design to use chunky yarn, and I love it more! The kit requires the purchase of the yarn. However, I know sometimes you want to stash dive. So as a gift to you, please enjoy a free copy of the pattern below.
If you prefer to support me by purchasing a kit, click the link below.
Hook: US M/N (9 mm) crochet hook
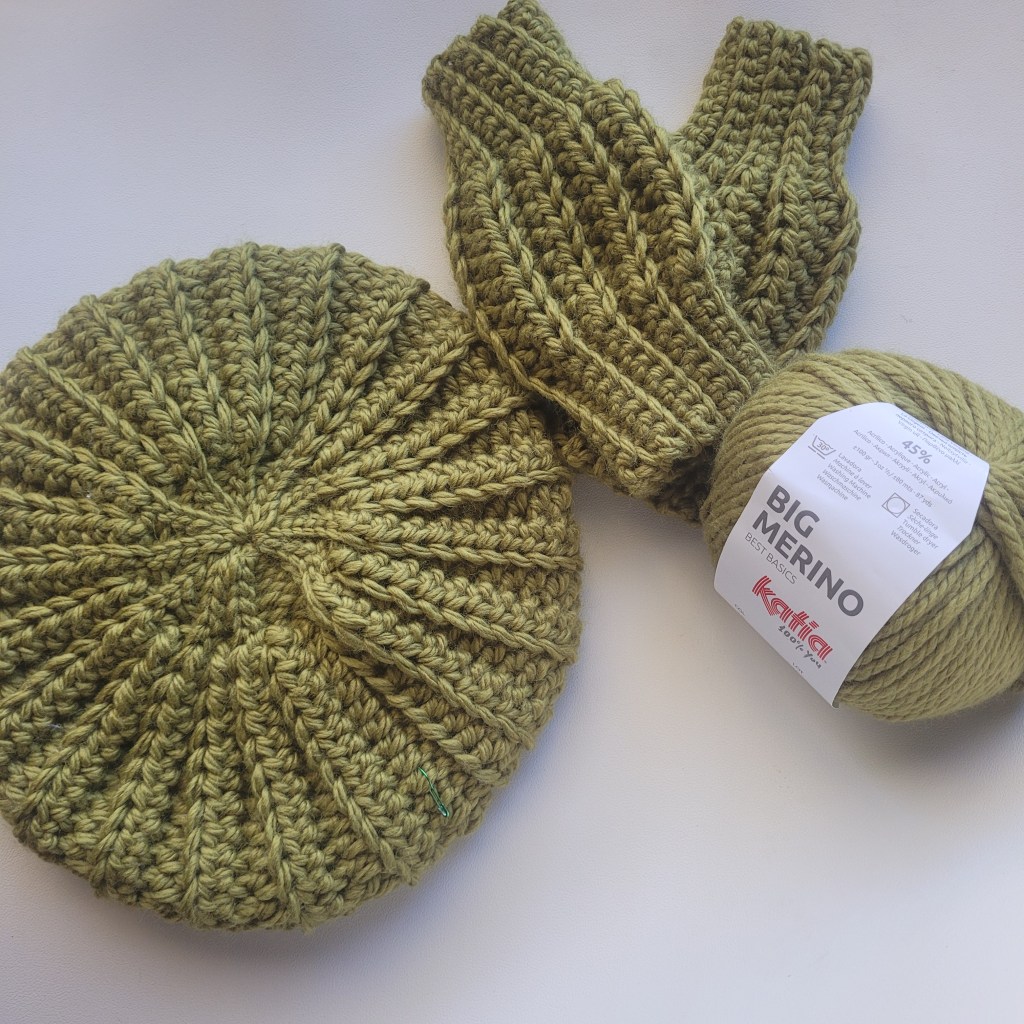
Yarn: Katia Big Merino 55% Wool; 45 % Acrylic
100 grams (3 ounces); 87 yards (80 meters)
Colorway: (18)
Yardage:
Beret- 158 yards (145.5 meters); 158 grams (5 ounces)
Mitts- 87 yards (80 meters); 100 grams (3 ounces)
Notions: Tapestry needle, scissors, stitch markers (2), pom or button (optional)
Abbreviations:
BLO: back loop only
ch(s): chain(s)
hdc: half double crochet
sc: single crochet
sk: skip
sl st: slip stitch
Skill Level: Beginner
Gauge: 9 STS x 16 ROWS = 4” (10 cm) Unblocked, half double crochet in back loop only.
Finished Size:
Beret To fit heads 18-24” (46-61 cm)
Mitts to fit wrist 6” – 8” (15-20 cm)
Notes
● The Sand Dollar Beret and Mitts are constructed side to side and then seamed along the
edges and top to close.
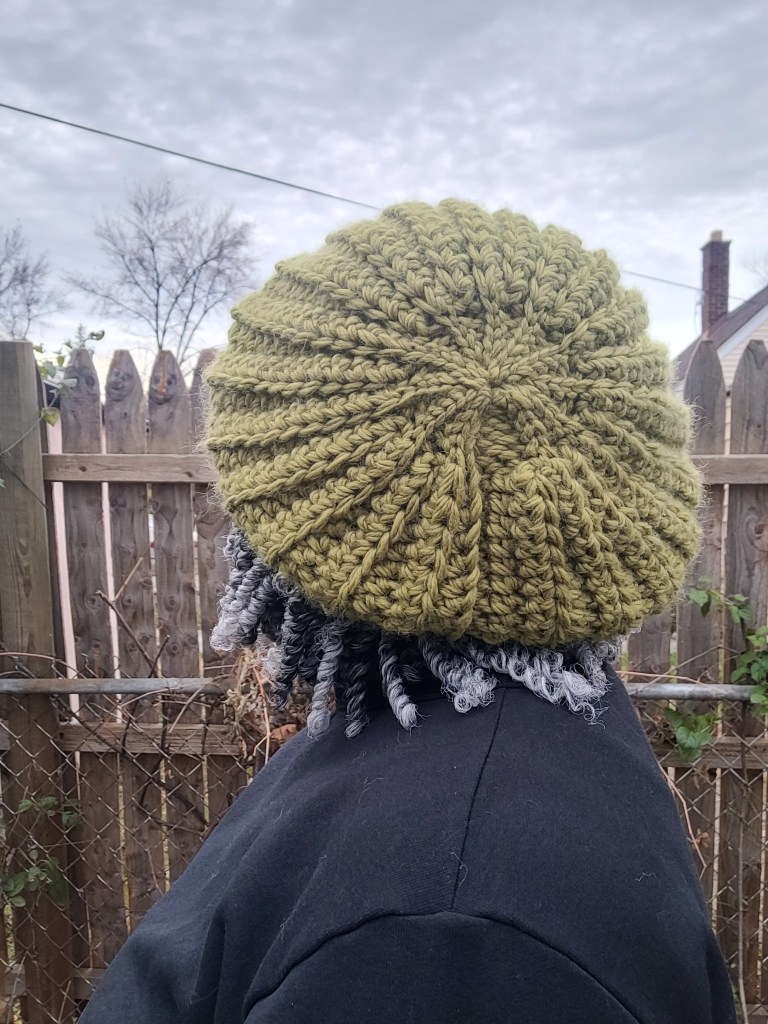
● The beret is created with sts of different heights to give the round shape that is
reminiscent of a sand dollar.
● Sts are worked in the back loop to allow for maximum stretch and the ability to fit most
adult sizes.
● It is helpful to place a stitch marker in the first and last stitch of the row and move up
with each new row.
● To close the top of the hat, whip stitch and cinch multiple times to close the hole.
Beret Instructions
Row 1: Ch 33, sc in second ch and next nine chs, hdc 17, sl st 5, turn. – 32 sts
Row 2: Ch 1, working all sts in BLO, sl st 5, hdc 17, sl st 10, turn.
Row 3: Ch 1, working all sts in BLO, sc 10, hdc 17, sl st 1, turn. – 28 sts
Row 4: Ch 1, working all sts in BLO, sk sl st, hdc 17, sl st 10, turn. – 27 sts
Row 5: Ch 1, working all sts in BLO, sc 10, hdc 17, sl st in the same st as the previous sl st, two rows below, sl st 4, turn. – 32 sts
Rows 6 – 45: Repeat Rows 2 – 5 ten times.
Row 46: Rep Row 2.
Finishing
Fold the hat so Row 1 and Row 46 are lined up. Working through the BLO of Row 46 and the base of the ch of Row 1, sl st across to close. Fasten off.
With a 10″ piece of yarn and a tapestry needle, whip stitch and cinch the top of the hat to close.
Weave in ends. Blocking is not necessary, but if you choose to, block lightly.
If desired add a button or pom for embellishment.
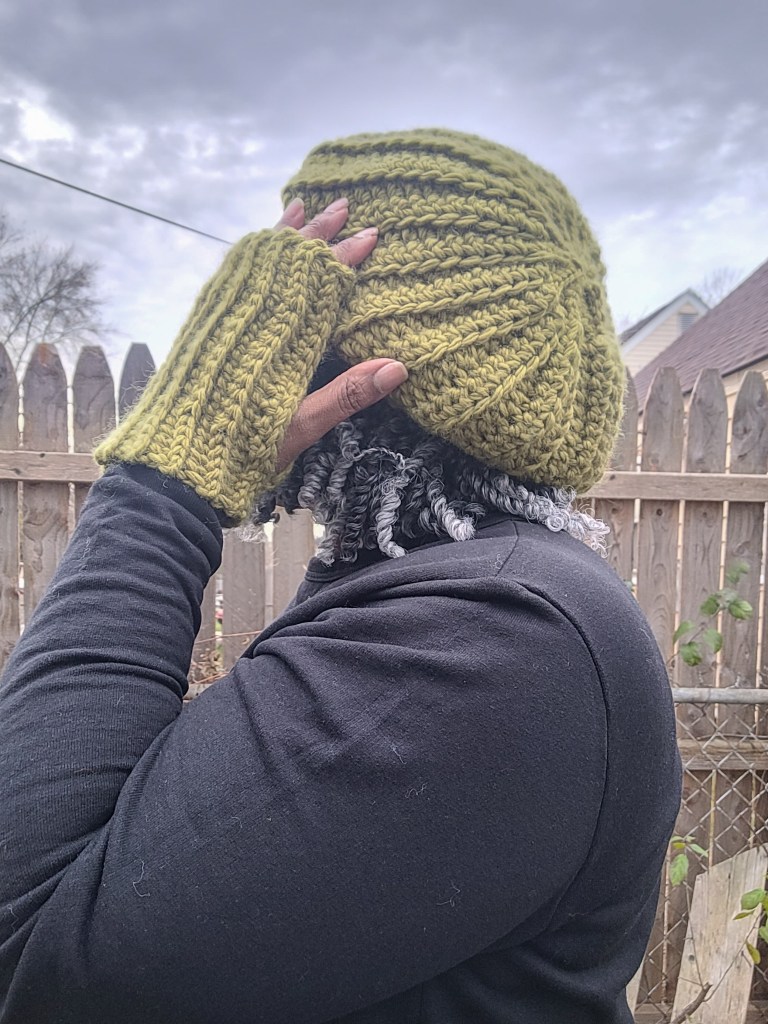
Mitt Instructions
Row 1: Ch 21, sl st in second ch and next 4 chs, sc BLO 10, sl st BLO 5, turn. – 20 sts
Row 2: Ch 1, working in BLO sc all sts, turn.
Row 3: Ch 1, working all sts in BLO, sl st 5, sc 10, sl st 5, turn.
Rows 4 – 23: Rep Rows 2 and 3.
Finishing
Fold the mitt so Row 1 and Row 23 are lined up. Working through the BLO of Row 23 and the base of the ch of Row 1, sl st 10, working into only the BLO of row 23 sl st 5 (thumb hole made), working though both edges, sl st last 5 sts. Fasten off.
Weave in ends.
Blocking is not necessary, but if you choose to, block lightly.
Mitts can be worn with more, or less, coverage by turning them around.
Happy Stitching!
-Natalie

